Like many of us in this dumpster fire of a year, I’ve been working from home since March. I’ve missed my coworkers immensely. We are an incredibly collaborative team and not being able to flop onto the couch in my coworker’s office to lament a frustration or hash out solutions with my boss has been a whole level of weird. Part of showing my appreciation for my wonderful work team is making individualized holiday/Christmas/winter themed cards for each of them. I work with 10 other people, so it’s not a LOT of cards, but it does take some planning.
However, in a time when it takes a minute for me to get going creation-wise, the plus side of not giving out cards to everyone on the same day in person is that this year, for the first time, I made a bunch of the same card and mailed them out. It was quick, easy, and they turned out really nice.
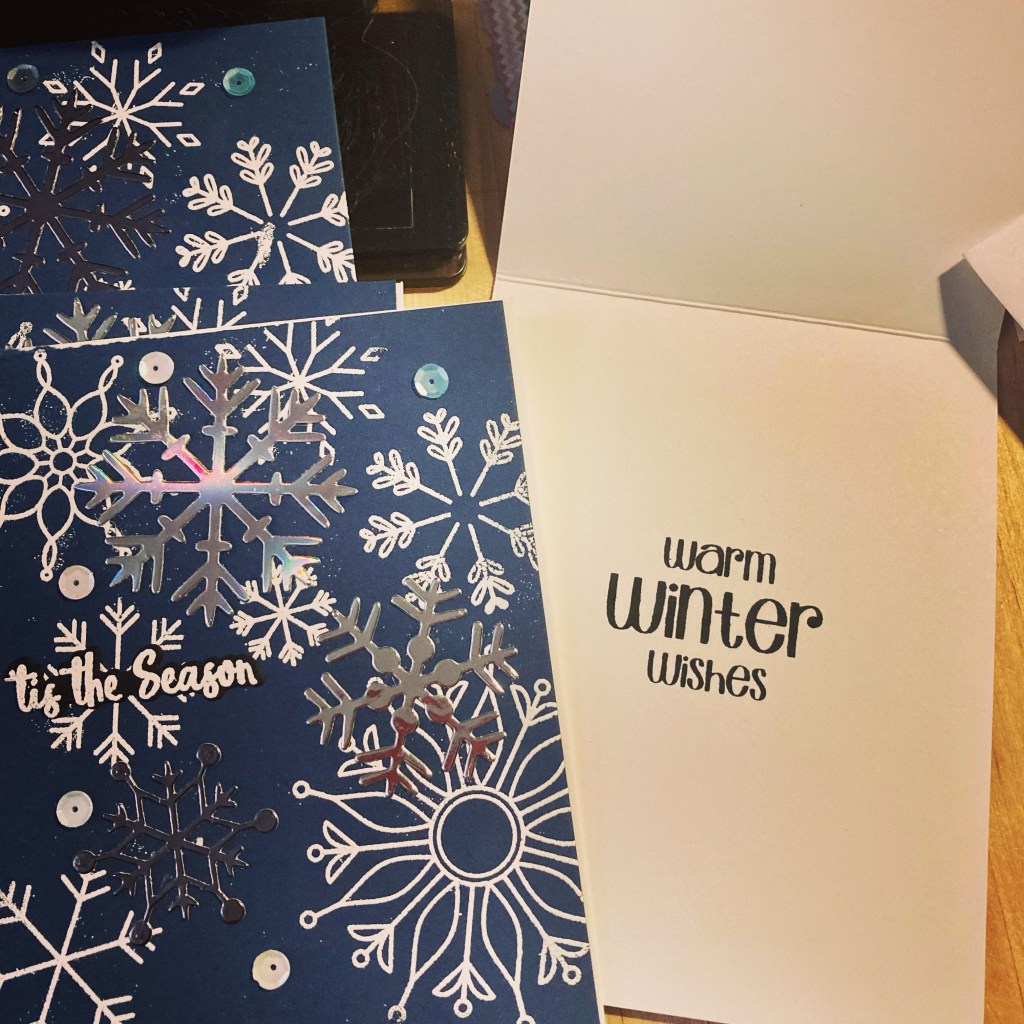
What I used:
- Simon Says Stamp Snowflake Builder Stamp Set
- Simon Says Stamp Soft Navy card stock
- Ranger White Embossing Powder & Recollections Silver Embossing Powder (discontinued, I guess?)
- Versamark Embossing Ink
- Carta Bella Joyful Snowflakes Die Set
- Silver Mirror card stock very similar to this Tonic card stock.
- Simon Says Stamp Holographic Card Stock
- The outside sentiment came from a Sizzix mini die and stamp set from Michaels several years ago.
- The inside sentiment came from the Pink & Main Warm Wishes Crafty Courtyard stamp set.
- Assorted tools and glues and embellishments that matched from an old Stamping For Less card kit.
The entire cards were done over several days and in many steps. I first stamped and embossed all the snowflakes; half in white and half in silver. Then I cut out all the silver and holographic snowflakes. Then I stamped and embossed all the outside sentiments. Then finally I sat down to assemble.
The nice thing about the Sizzix set is that it comes with a die for the sentiment, so I stamped and embossed a bunch of them and was able to cut out the best ones. I then glued everything down; first the snowflakes, then the sentiments. I then stamped Warm Winter Wishes inside each of my A2 standard sized card bases, followed by attaching the card fronts to the card bases. Finally, I attached the sequins, let them all dry completely, addressed the envelopes, and wrote personal messages in each card. The next day they all went in the mail.
As I wrote out the list of supplies, it seemed like a LOT, but it went very quickly. Especially since I made sure the follow Amy R.’s method of doing everything as an assembly line. First A, then B, then C, continue in that fashion until done.
My next post will be an unboxing of sorts. I purchased one of the Simon Says Stamp mystery boxes and will show you my loot and give you a price comparison. Thanks for joining me and see you soon!
